(click on photos to see larger versions)
This feels a bit vulnerable. For posterity, I'm going to post photos of each of the quilts I worked on in my first week as a longarm quilter - good, bad, and ugly. I want to document my progress, and hopefully encourage others who might be in the same boat (or will be some day). But in order to show progress, I have to show lack of ability to begin with!
I've been finishing client quilts for a couple of years on my domestic sewing machine, so I've built up a lot of muscle memory in that platform. Some of it translates easily to the longarm setup. Some, not so much, as you'll see. I practiced for a few intense days on a huge piece of cheap unknown-fiber-content fabric I got on clearance at Fabricland. But it's hard to take a big, wide open, blank piece of fabric seriously when you're practicing. If I don't like something, I just travel on over to the next blank piece of fabric 5" away and start again. Not a luxury you get when you pull the trigger on a real quilt top.


So, thanks to some lovely ladies in my church and also in the Victoria Quilts program (which gives free quilts to cancer patients in our area), I was given several "practice quilts" to try out before I turn myself loose on paying customers. There's just something to be said for making the commitment to an actual quilt top, having that pressure to know that it's HAPPENING - it's not just practice. I warned these ladies that I would try my best but that I wasn't guaranteeing anything. They were all so trusting and generous!
My goal was always to be up and running for customer quilts by Labor Day. As my machine's arrival kept getting pushed back, that goal got less and less likely. But the Lenni and I seem to be learning about each other nicely. We'll see.
First "real quilt": Old McDonald Baby Quilt - from my mom
Why are moms always at the ready to take the ugliest cookies, the one-arm-shorter-than-the-other homemade handicrafts, the practice-on-me ANYTHING? Maybe all moms aren't, but I'm lucky mine is. Thanks, Mom!
This was a cross-stitch kit that Mom bought somewhere. It was printed with the cross-stitch pattern, and it was already industrially quilted when purchased. Why do they even sell kits like this? When the stitcher applies needle and thread, all their criss-crosses show on the back of the quilt. Are they just supposed to leave it this way? If anyone knows something I don't, I (and Mom) would gladly welcome wisdom! Anyway, Mom sent some backing fabric, and I just loaded it on my frame and quilted right over all that pre-existing quilting to adhere the backing.
In one way this was good, because my stitches would not be as noticeable amongst the factory's stitches, so I felt less pressure. But I realized that it was also a little tricky, because it made it hard to see which territory I had already quilted and which was yet to do. I did some outlining around cross-stitches and stuck to some simple stippling.
I applied binding to the quilt top, and Mom will wrap it around to the back side and stitch it by hand. And I learned a bit about tension - I thought it was good, but after removing it from the frame and really looking I noticed that the bobbin (bottom) thread was just sorta laying on top of the fabric and not meeting in the middle of the quilt sandwich. Corrected going forward.
I also learned: pre-printed cross-stitch tops aren't necessarily square. Trim up before-hand!
Next: Balloon Animals Crib Quilt - Another experiment on Mom
This at least was a whole-cloth piece that was just the quilt top. I mostly followed their suggested quilting lines, which was really good practice at trying to be precise. Except I did not stick to the pre-printed straight line on one side of the border, because it wasn't actually straight. But by the time I got all the way around one pass on my frame trying to make a straight line using the cross-stitching for registration I said, "flying fart," and gave up for the line on the inside of the border. I decided to just GO with the pre-printed line, because there wasn't much of anything "straight" on this piece. Who does quality control at the factories that print these things?? I quilted (aka: clung in fear to) a basic stipple for the background, but mustered up the bravery for some overlapping circles in the border area. The ends of the binding joined together slicker than snot, using the same method I learned in my very first Beginner Quilting class. And my dedicated little quilting mascot helped! Notice she's on pointe - I assume she thinks my batting holder is a ballet bar.


Next: Joanna's Rail Fence Donation Quilt
This quilt got me totally jazzed about the SPEED with which I'm able to quilt on this longarm setup. This was a lap-sized quilt, and I completed it from start to finish - including loading on the frame - in 2 hours. It would probably have been 3 times that AT LEAST on my domestic machine.
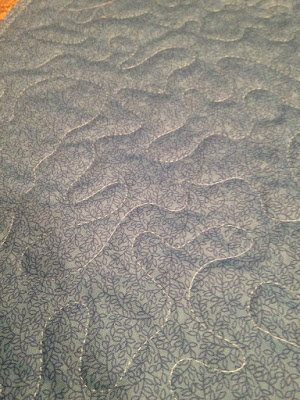
This quilting motif - I call it paisley-ish - was fun and fast. There are no points that meet or lines to backtrack over, so it was worry-free, too. I tried to keep it on the larger side of the scale, because I know it's going to Children's Hospital, and I wanted to keep it cuddly and soft.
Thanks to Joanna for being the first brave outside-the-family volunteer!
Next: Green Stash-Stripper Donation Quilt
Lots of lessons with this one.
Compare ends of the quilt top before loading and see if they are the same length. It became apparent to me as I got further and further into this one that it was a trapezoid quilt - wider at the bottom than the top. I had marked my roller bars to keep it square while quilting, and I kept have to ease in more and more extra fullness as I worked my way south. This would NOT have been possible - or at least REEEEALLLY un-pretty and not easy - on a domestic machine. There just plain would have been wrinkles in the quilting. But by keeping the scale of the allover swirls rather large, there was enough room to just work it in and have it be a little puffier. I don't think anyone will notice. In future, I honestly think I'm going to try less to keep things square. This sorta splice-and-whack piece was generously donated, and it will be serviceable and lovable, even if it's a little trapezoidenal!


Another lesson: really emphasize the importance of extra backing fabric to your clients. Every longarmer I know asks for an extra 4" on each side of the quilt top. That makes the backing at least 8" wider and longer than the quilt top. The length is CRUCIAL - because it is necessary to load the quilt on the frame. The width is less important, but on this one at one point I had less than 1" on each side to spare. Tricky and stressful!
Next: Vibrant-Colored Wall Hanging
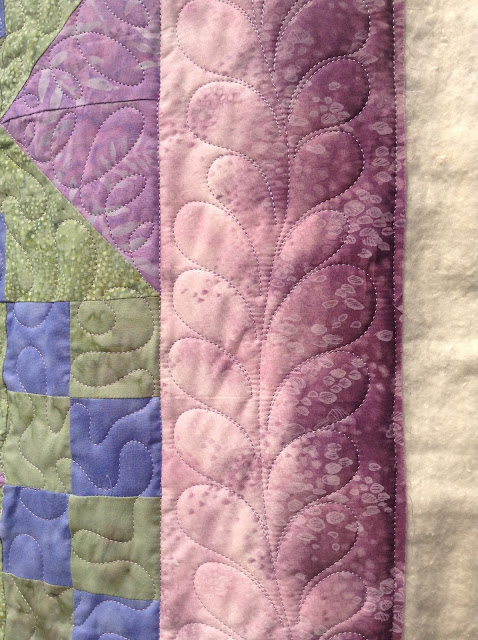
Believe or not, I BOUGHT this quilt top. I got it on Ebay for $23USD, and some poor woman somewhere in Kentucky has the arthritic hands and $0.40/hour to prove it. I don't know why this person was willing to sell off the beautiful top (at a Buy-It-Now price, no less), but I'm the richer for it. I bought it this spring for the express purpose of practicing on my longarm-to-come, and I'm so glad. I love how it turned out. After a couple of all-over designs, I was ready to experiment with some more details.
I learned...
• I love working with rulers. I really TRIED to make longarm rulers work on my domestic machine, but it was basically a joke. So much faster, more accurate, and EASIER on the longarm. All the straight lines and near-perfect curves you see here were accomplished with rulers.
• I really need to work on pebbles/pearls/circles. Okay, good to have a quest in mind.
• Again with the squareness: One corner was a bit winged out, and I tried to compensate by stretching the quilt top out on the edge below that corner, to make a straight and square edge. I tacked it down to the batting and backing, thinking it would be held forever square. But all it did was suck the backing fabric back toward the middle and created a huge wrinkle down the center of my back. C'est la vie. I wonder if it would have prevented that if I'd used my clamps on the sides. Lessons yet to learn.
• My left hand is basically useless. I've been using my right hand to guide my machine, and my left hand just skims along on the fabric, feeling the texture, sometimes pushing down on the fabric to take up some fullness, but basically lounging by the pool. I was able to get old lefty to hold the rulers in place somewhat reliably, but when I tried to switch hands and have my right hand hold the ruler while my left hand simply dragged the machine along the ruler's edge - NO WAY. It made for some awkward contorting of my body when I needed to use the left side of a ruler!
Onward and upward...
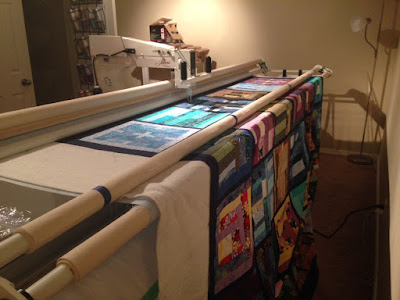
Here's a peek at the piece I've loaded on the frame right now, to be covered in a future post, because (in the immortal words of Lili Von Shtupp) I'm tired. I've been pulling late nights fiendishly quilting since my husband's away, and I've got a 2-year-old potty training. This one's approx 83x97" - I'll be working on it for a while!


