I often get asked to help friends (who are not quilters) make quilts as baby gifts. I recommend an option that can let them have some involvement in the creative side of the project, without have to know how to sew - a whole cloth quilt. This is a piece that uses a single piece of fabric for the quilt top - no piecing required. The client goes to the fabric store, picks out fabric for the top, backing, and binding, and I take care of the rest. It goes back to them ready to gift to their expectant friend.
Here's an example done for my friend, Kate, in Nebraska. We actually did this collaboration long-distance. She ordered the fabrics online and had them shipped directly to me. I quilted it up, and shipped it back to her. Easy peasy!
If this is an idea that interests you, let me know. I can give you pointers about types and amounts of fabric to buy.
Sweet dreams to the baby who cuddles with this piece! One side is a super-sturdy canvas-ey cotton that will be very durable, and the other side is a soft, supple minky fabric. Great snuggling fodder for any baby - or adult!
This WHALE of a quilt came from Gail, a new client and kindred quilter right here in my own hometown! She is active in a few local quilting groups, and these ladies are just so productive! I'm amazed by all the beautiful work they do!
As far as I can remember, this is the biggest piece I've quilted to date. It was 93x113". That's a lot of quilt! Still, I was able to load it horizontally on my frame, which was nice, because it allowed me to get more quilting done in fewer "swaths". Gail gave me plenty of extra backing fabric, which allowed for this. It was a single cut of extra-wide fabric, which meant no seams to try and finagle with. I love that extra-wide backing!
Thanks for trusting this beauty to me, Gail!
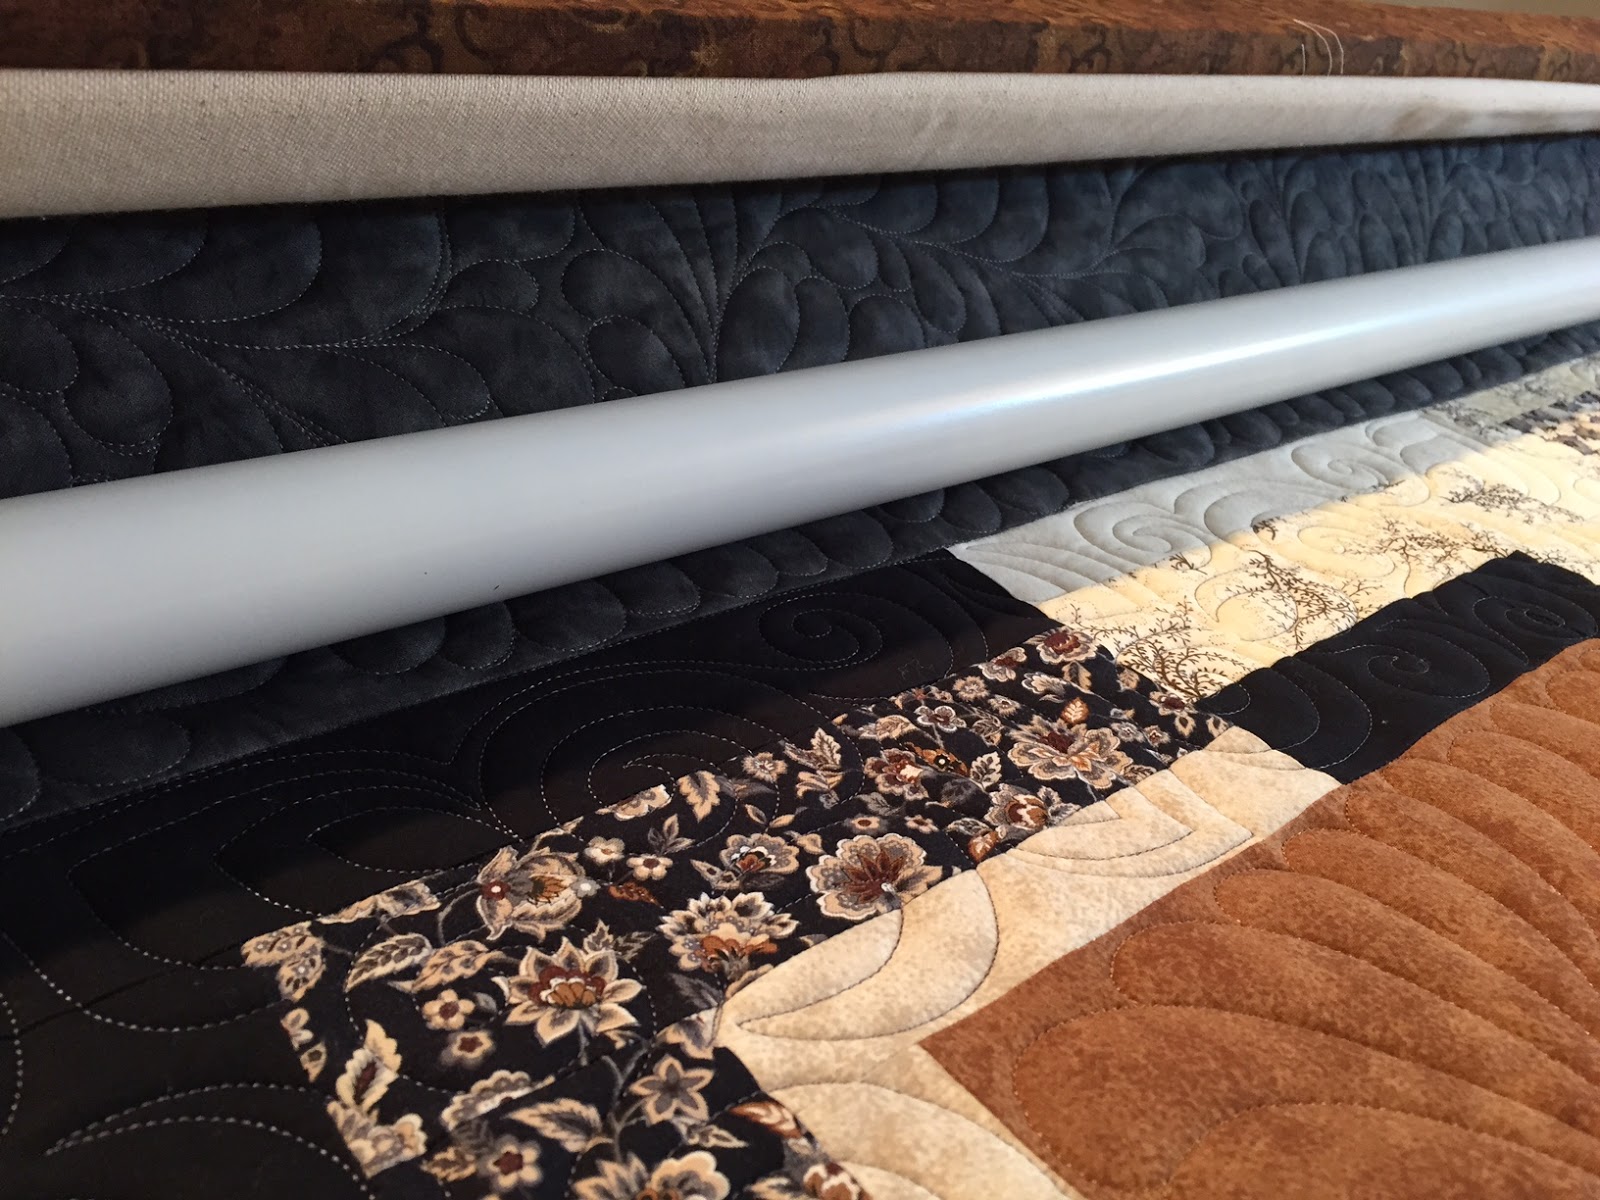
Just finished quilting, and re-rolling the whole thing back onto the belly bar, so I can start attaching binding at the top.
This is a question I get all the time. Friends often have a hard time understanding what it is that I DO, when it comes to all this quilting rigamarole. People often email me and ask if they can buy a quilt. But what they don't realize is that I'm not actually "making" a quilt. Not from start-to-finish.
I'm actually more of a sub-contractor. I provide a service. Sorta like how a home-builder might hire a roofer or a dry waller. I perform PART of the quilting process for other people. My clients are actually quilters themselves. They sew together pieces of fabric to construct a quilt top. Their step is called "piecing".
When I get a quilt top, this is what it looks like. This one was pieced by Jane Woods in Richmond Hill, Ontario. It was made for Kim Powell of Blue Grass, Iowa, to commemorate her family farm earning a "Century Award".
My clients also provide a large piece of fabric for the back of the quilt. I mount this on my quilting frame. It gets rolled onto two bars and gently stretched taut.
On top of the backing fabric I spread out a layer of batting. This is a soft, fluffy layer that gives the quilt warmth. Think of it like insulation inside the walls of your home.
Then on top of the batting, I spread the quilt top, making sure to keep everything straight, flat, and square.
If you'd like to see it in another view, watch this video (double click on the video to view full-screen mode):
Now it's time to start quilting! First I run a straight line along the top edge of the quilt top, to secure the three layers (backing, batting, and top) together. I also run a line along the edges on both sides - as deep as my frame will allow.
I sometimes add a few marks to the quilt top, to give myself a guide for even spacing. I use a variety of tools and marking pens to achieve this. For this quilt, I used a button-hole measuring guide and an air-soluble pen to mark gentle curves in the wide border that will become the spine of a feather motif.
Then, I start stitching. My machine is completely hand-guided. There is no computer doing the sewing. It's all me. The only automation my machine has is a stitch-regulator. It's a sensor that can tell how quickly or slowly I'm moving the machine, and it makes the needle go up and down faster or slower to match my speed, so that all the stitches are the same length.
Here's a video of me stitching the area you see above (double click on the video to view full-screen mode):
Another tool I use occasionally is a extra-thick acrylic ruler, designed specifically for longarm quilting. It allows me to drag the machine's hopping foot along the edge of the ruler to make a perfectly straight line. I will often eye-ball a straight line if it's only an inch or two in length. But much longer than that, and I feel more comfortable using a straight-edge.
You can see here that my quilting frame is only about 16" in depth from top to bottom. So I have to work in sections. When I get a swath done, I roll the quilt up on the take-up bar and continue on to the un-quilted area. It's a lot like bailing hay or mowing the yard!
Here is a view of the side border. I have to stop at the bottom of my frame and then re-join my sewing line after I advance the quilt.
I continue on this way - quilting and rolling, quilting and rolling, until I've advanced myself all the way to the bottom of the quilt, and boom! I'm done! I take the quilt off the frame and trim off the excess backing and batting, as a courtesy to my customers.
Now, some customers also hire me to attach the "binding" to the front of the quilt for them. This is a long strip of folded fabric that secures the raw edges of the quilt. I attach it to the front, and send it back to the owner, ready for them to wrap around to the back side of the quilt and hand sew it there.
This is the place where the two ends of the binding adjoin.
And voila! My part is done! I think the quilting adds so much to a quilt top. My goal is to always enhance a quilt top. Sometimes, this means simply being almost invisible. I wouldn't want my quilting to distract from the piecing or the patterns in the fabric. Other times, when there is a lot of "open space", I can add secondary patterns with the lines of my quilting.
The discerning eye will likely notice that this binding has actually been finished (adhered to the back of the quilt). I borrowed this quilt back to photograph it as a finished piece.
Common questions and comments:
What's the deal with that fancy machine?
The machine I use (since I got it in August 2015) is called a "longarm quilting machine". It is honestly a lot like a regular sewing machine, just much bigger, which allows me to cover more territory much faster. The main difference is that unlike a regular domestic sewing machine, my machine is mounted on a structure of wheels and rails. On a domestic sewing machine, the machine sits stationary on a table, while the sewist moves the fabric. On my longarm machine, the fabric stays stationary on the frame, while I move the actual machine around. Before I got my longarm machine, I quilted for customers on my domestic machine. But now I can be so much faster and more precise!
Isn't that kinda cheating?
Well, I sure don't think so. Is it cheating if a cabinet maker uses a table saw or an electric sander? Should we insist that he/she uses a hand saw or just a piece of sand paper? Or should we all be driving horse-drawn carriages instead of cars - or for that matter, maybe should we be WALKING? I just see it as using a tool that is available to me to be efficient and quick. I've often wondered what my fore-mothers of quilting would say about all the tools and techniques we use today. And I think they'd say, YES! They used what technology was available to them at the time - needle and thread, or treadle sewing machine, or whatever! This is the technology that is available to use now.
What pattern are you following?
The one in my head! I quilt free-motion style. It's whatever comes out of my head and through my hands. It's like holding a pencil and doodling on paper. Watch this (double click on the video to view full-screen mode):
But the shapes look perfect!
Well, bless anyone who says so! I have had lots of practice, and I continue to get better every day. But if you look closely, you will see that my quilting is in fact NOT perfect. My goal is to try and be consistent, but of course, I'm human. That's what I think makes my quilting style endearing and authentic. It is from me and of me. It is not a pattern on a computer. I didn't just push a start button and walk away. There are machines that have highly sophisticated computer programs, but that did not appeal to me at all. I want to touch every square inch of that quilt and make my own mark on it. For me, it is a free-flowing, human art form.
So, people actually pay you to do this? Why?
Well, for a variety of reasons. Many times, my clients don't have the time to get through all the projects they want to, if they also take the time to do the quilting process. It can also be very daunting to tackle a large quilt when using a domestic sewing machine. Many home sewing machines have just a 6" throat - trying to squeeze a king-sized quilt in there can be tricky! My longarm machine is considered small, and it has a 20" throat. Others simply don't have the ability or desire to be good at the quilting part of the process. By the time they are done cutting, piecing, pressing, etc., they just want it DONE.
How did you even get into this?
I started sewing in 4-H as a child - mostly garment sewing. I made my first quilt when my little sister went to college and a second one when my older sister got married. But I had no formal training and was really just going by what I thought was common sense. When I look back at those early quilts, I don't know whether to cringe or laugh! They were horrible and are falling apart as we speak! My first quilting class was in (I think) 2008, in Ames, Iowa, when a friend suggested we try it. And BOY, was I ever HOOKED! I quilted mostly straight lines with a walking foot on my domestic machine, before I got the gumption to try a darning foot. I stippled the crap out of everything! As I got more and more experience, my quilting improved. I took some online classes on Craftsy, and also watched a boatload of videos on YouTube. I started quilting for friends and then paying customers. It wasn't until I had babies of my own that I really got the itch for a longarm quilting machine. My free-time was so limited - I simply had to get more out of it. With a longarm I can go much more quickly, and I've also found I can be much more precise. Who knows what I'll gravitate toward next!
Can I buy a quilt from you?
No. I don't even have very many finished quilts on-hand. My clients send quilts that they've started. I finish them and send them back. I don't have any merchandise to sell! In fact, the quilts I do have here are just the ones that I did early on, that I now think are so ugly that I'm ashamed to sell/give them away! So the quilter has NO nice quilts! It's like the old saying, the cobbler's children go barefoot.
I want to have a quilt made for my friend who is having a baby, but I don't sew.
I have done quilts for people in the "whole cloth" style. This means there is no piecing involved. The quilt top is one solid piece of fabric. You can feel like you're making a special piece for your friend, without having to be an actual quilter. Go to the store and pick out your favorite fabrics for the top, backing, and binding, and I'll turn it into a quilt, like the ones below. If this idea interests you, let me know. I can give you pointers about types and amounts of fabric to buy.
How long does a quilt take to do?
That's such a variable answer. If the customer wants a simple all-over pattern, with no custom quilting, I could get a lap-sized quilt done in as little as a few hours. But if the quilting is denser, more intricate, more specialized - it takes longer. For instance, the barn quilt you see at the top of this post took me three days. I have no real concrete idea of how many hours, because it was done in lots of small segments, between helping babies potty, feeding babies, doing laundry, making meals, etc.
I felt a lot of pressure on this quilt. It is my highest profile quilt to date. It came to me from Linda, owner of Rumpled Quiltskins store in Okotoks. She designed and embroidered this stunning piece as an example for a class she's teaching this fall. I had not worked with anything this heavily embroidered, and the exquisite intricacy of it, frankly, intimidated me. What if I messed it up??? Linda also requested I use some of the same shapes and motifs that were present in the Russian-style embroidery of the quilt. Not exactly in my wheelhouse, so I took to my sketchbook and started practicing. Then I practiced quilting on muslin, then other quilts that I had ready for practicing. I kept putting it off, worrying about how I was going to pull this off. But eventually I got to the point where I just had to pull the trigger. Linda wanted this piece to go to Calgary's Creative Stitches show, to be hung in her booth (for all the world to see!), so I had a deadline. Eek! There are things that I think turned out well, and there are things that I desperately wish I'd done differently, but thanks to the lessons of my quilting hero Angela Walters, I won't be pointing those things out to you!
Will you just look at the amount of thread that was put on this thing? It's amazing!
I sketched and practiced the corner motif so much!
It was based on this shape that appeared a lot in the embroidery and I'm told is a very "Russian" shape.
The three comma-like swirls were my attempt at copying....
this shape in the embroidery. I really love this shape and am glad I was nudged into learning it. It's similar to swirls that I already have been using in my repertoire, but enough different that I think it adds a bit more character to the design.
The intertwining ropes reminded me of Irish designs I've seen. I did a much simpler version of a rope beside it, because honestly, I just don't think I'm capable of quilting with that amount of intricacy yet. Hopefully it compliments the more ornate rope designs in the embroidery.
The end-cap I put on the outer border designs remind me of a fleur-de-lis you often see in French design.
It was inspired by THIS place in the embroidery.
And here it is on display at Creative Stitches. I wasn't able to be there myself, because I was already double-booked with a quilting class in Edmonton and another quilt show at my church where I had a booth the same weekend. But thanks to a few Facebook friends, I got to see posts of my work on display in the Rumpled Quiltskins booth in Calgary. I felt like an actress seeing her name on a marquee for the first time!